Have you ever bitten into a pie crust so buttery and flaky that it actually made you close your eyes for a second?

The kind where little golden shards break off and melt on your tongue?
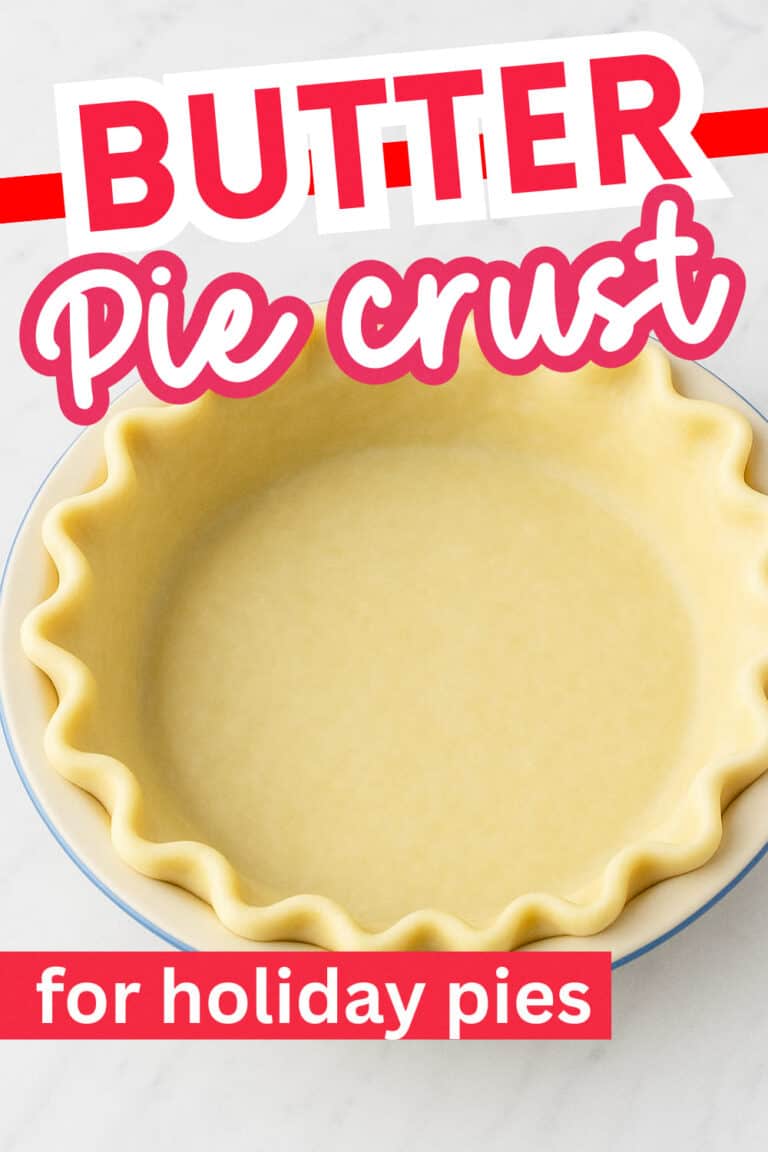
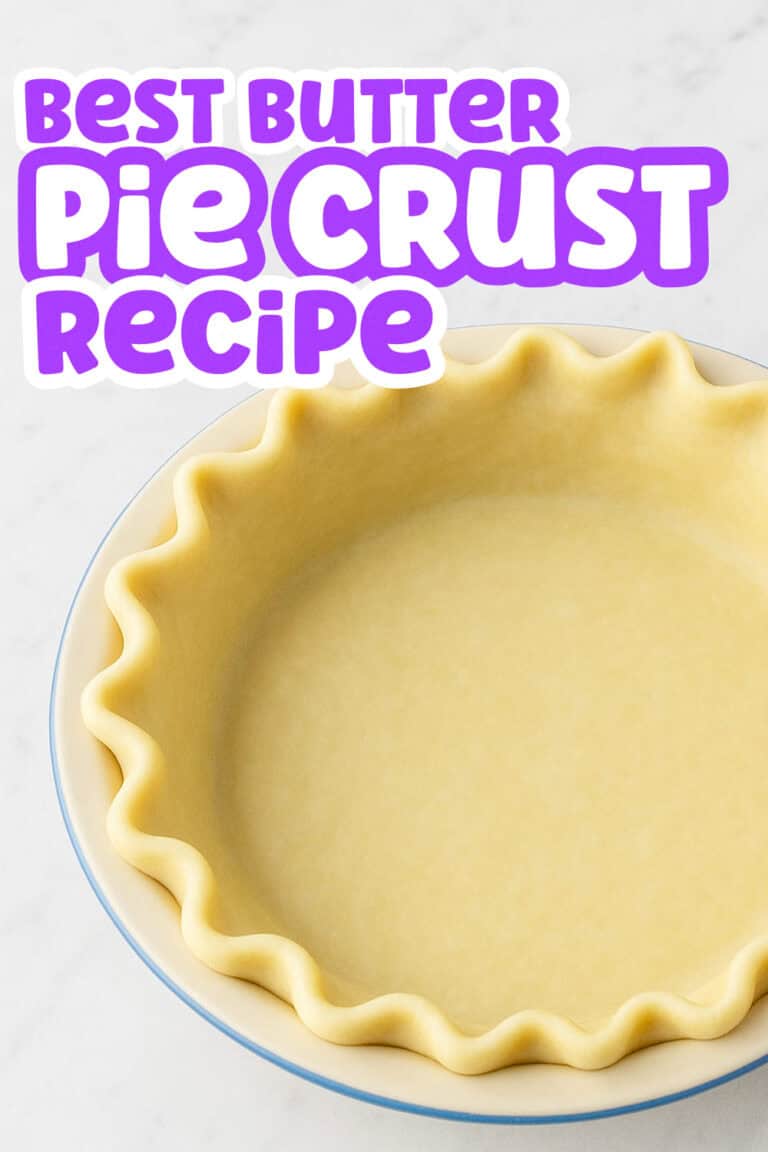
This butter pie crust is homemade, easy to make with just FOUR simple ingredients, and amazingly flaky and delicious!
It’s totally foolproof and the ONLY pie crust recipe you’ll ever need for those holiday pies you’ll be making.
I perfected this recipe after trial and error and it’s simply perfect now.
Trust me when I say this pie crust is life changing.
The secret? ICE COLD ingredients and minimal handling.
You know that feeling when your teeth sink into a perfectly flaky, buttery crust that just melts on your tongue?
That rich comfort that only homemade pastry can give?
That’s what you’ll get with this recipe. No more store bought crusts that taste like cardboard, friends.
Let me show you exactly how to make the flakiest most delicious pie crust that’ll have everyone at your holiday table asking for your secret. Its actually so simple once you know the tricks!
Best Butter Pie Crust That’s Oh-So-Flaky Too
Making pie crust from scratch is INTIMIDATING!
For the longest time, I would break into a nervous sweat just thinking about it. All those strict rules about not touching the dough too much, keeping everything perfectly chilled, and those horror stories about tough, chewy crusts had me running to the freezer section for pre-made crusts every holiday season.
I mean who has time for all that stress when you’ve got a million other things to prepare?
But that’s exactly why I love this recipe so much. It takes all the fear out of making homemade crust.
No fancy equipment needed, no pastry degree required! Just four simple ingredients and some basic steps anyone can follow.
What makes this recipe different is how forgiving it is.
Even if you’re not perfect with your technique the first time, you’ll still end up with something delicious.
The instructions are crystal clear and I’ve broken everything down into manageable steps.
Trust me, if I can make this work while juggling everything else during the holidays you definitely can too!
The Only Ingredients for a Flakey Pie Crust
Homemade is SO much better and honestly not that hard once you know the tricks. Here’s what you need:
- Unsalted butter. SUPER important that its really cold! If you only got salted butter in your fridge just use a little less salt than what the recipe says.
- All-purpose flour. Make sure you fluff it up first then level it off when measuring or your dough will be all wrong.
- Salt. Try to use fine sea salt for pretty as it works great for a flacky pie crust.
- Ice water. Cannot stress enough how important cold ingredients are for this! Makes all the difference.
Step-By-Step How to Make a Pie Crust
Don’t let anyone tell you homemade is hard. Total game changer once you try it!
Step 1: First take your butter and cut it into little cubes. Toss these in the freezer for like 15-20 minutes. You want them pretty much half frozen. Trust me on this!
Step 2: While thats happening measure out the flour and salt and dump it in your food processor. When the butter is ready add it on top. I always break up any chunks of butter that are stuck together.
Step 3: Now pulse everything a few times until it looks sorta like wet sand. You should still see some little bits of butter but nothing bigger than a pea.
Step 4: Time for the water! With the lid on keep it running and pour in 1 tablespoon of ICE cold water thru the top. Then pulse a couple times. Keep doing this one tablespoon at a time.
Watch carefully! The dough will start coming together and pull away from the sides. For me it usually takes 8 tablespoons but yours might need a little more. If you accidentally add too much water just throw in another spoon of flour and pulse quick.
Dump everything onto your counter or a cutting board. My youngest always wants to help with this part but her hands are so warm!
Push it all together into one big lump then split it in half. Shape each half into a ball and then flatten them into discs. Work fast because your hands will warm the dough and melt the butter which is NOT what we want.
Stick each disc in a ziplock bag and put them in the fridge for at least an hour. You can actually keep them in there for up to 4 days if you’re prepping ahead.
Time to Roll Out Your Butter Pie Crust
After your dough has chilled properly take one disc out of the fridge.
Let it sit on the counter for just a few minutes. You need it just soft enough to roll but still COLD!
Make sure your counter has a light dusting of flour and your rolling pin too.
Be careful though! Too much flour = tough crust. Nobody wants that.
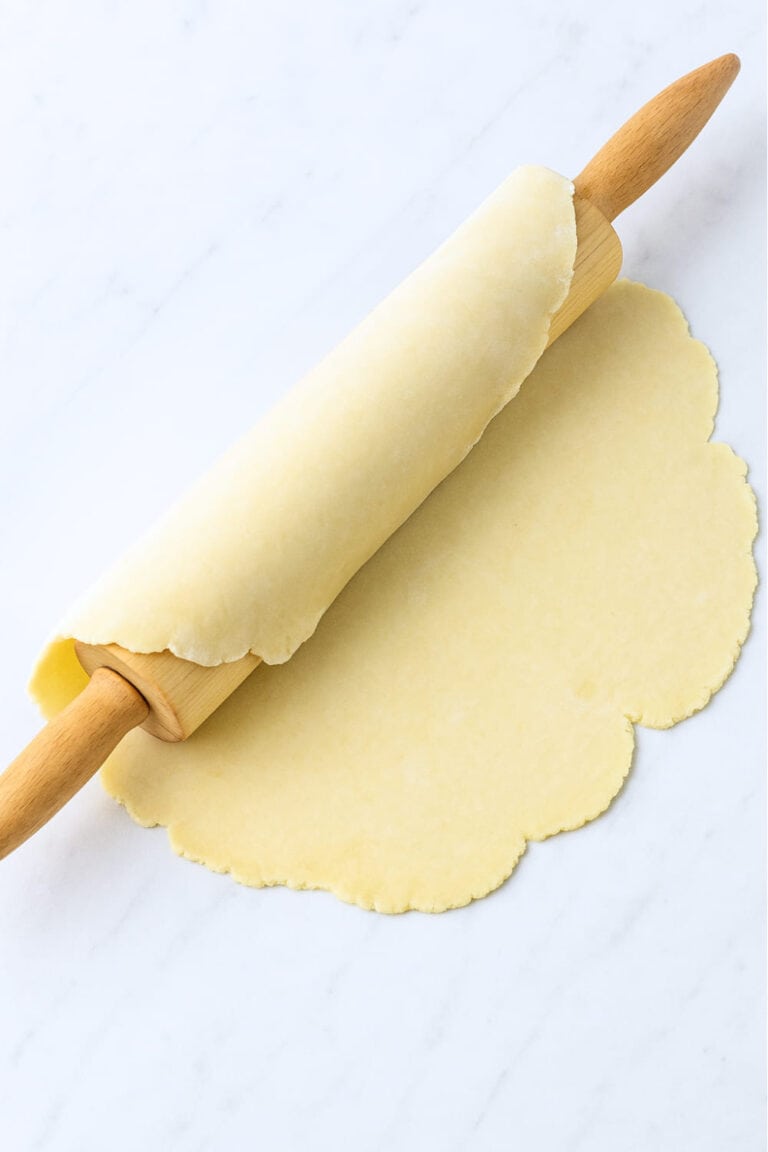
Start rolling from the middle and push outward.
Then turn the dough a quarter turn and do it again. Keep going until its about 4 inches bigger than your pie pan all around.
If you notice the edges getting all crack-y just pinch them back together and keep going. This happens to me all the time!
When you finally got it rolled out let it just hang out flat for about 5 minutes. This helps it relax a little.
Now for the scary part!
Gently roll the dough onto your rolling pin like you’re rolling up a poster.
Then center it over your 9 or 10 inch pie pan and unroll it.
Lift the edges slightly so you can press the center down into the corners. Don’t stretch it or it’ll shrink when baking!
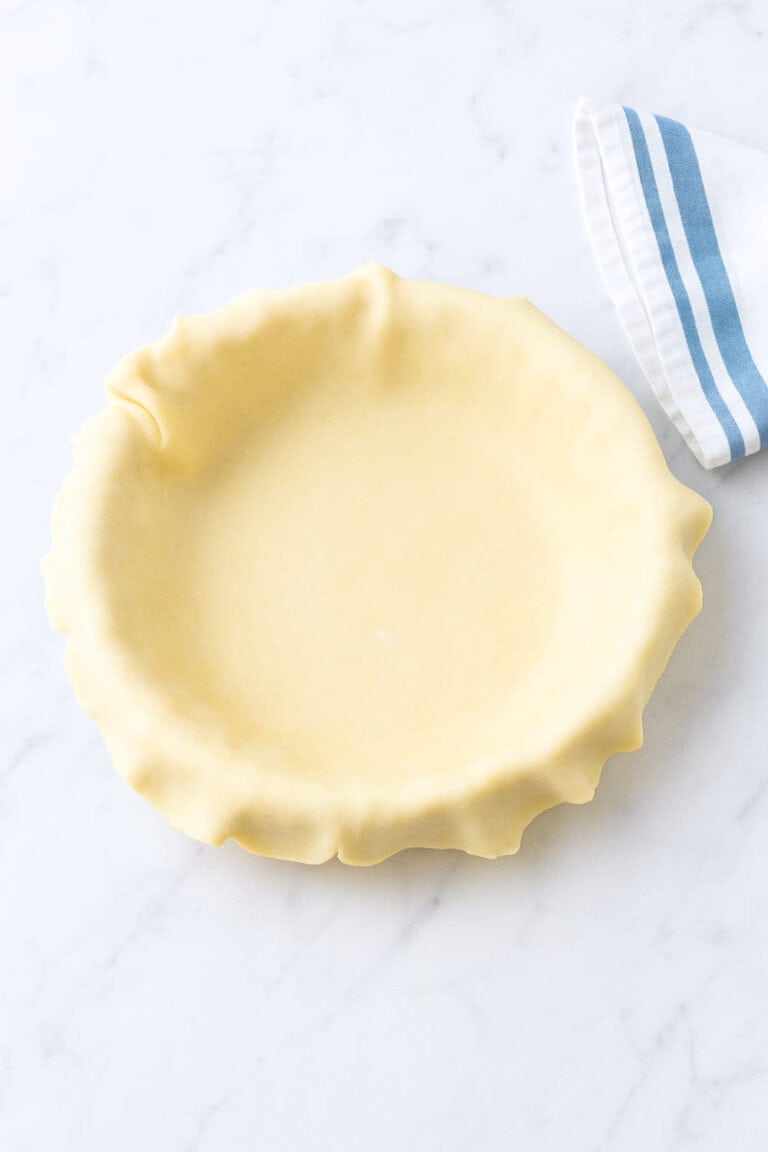
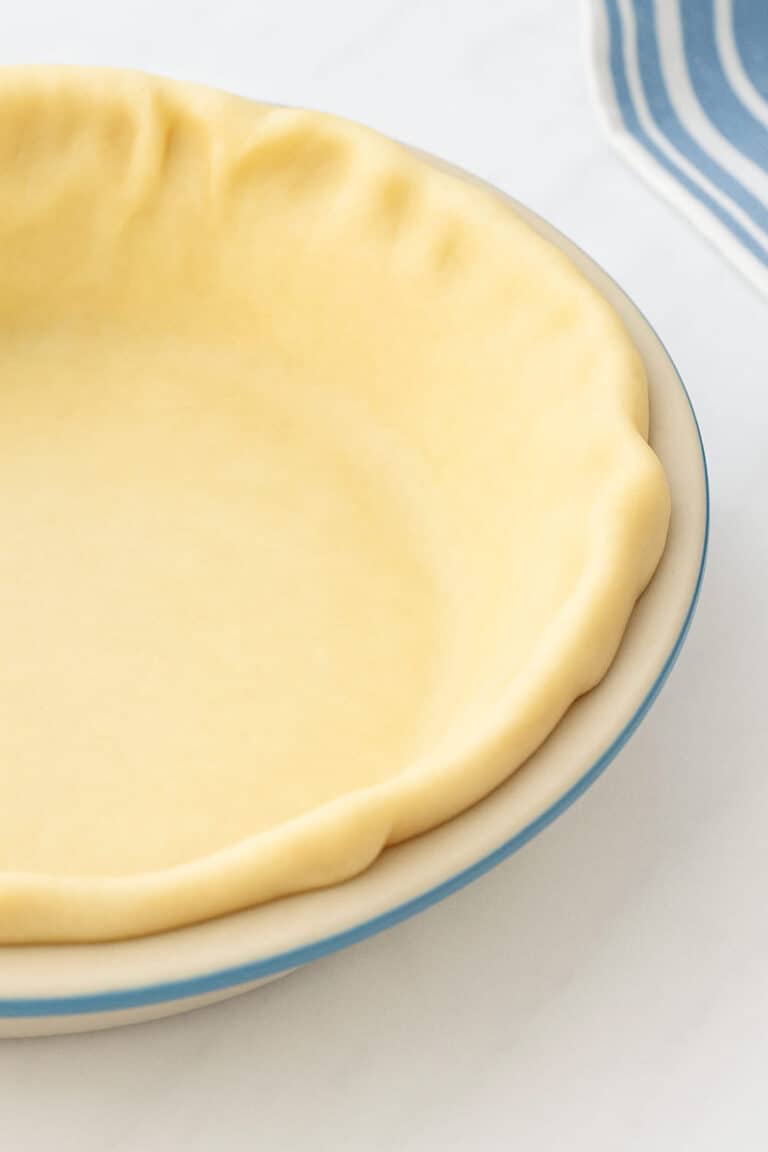
Last step press the sides against the pan and fold any extra hanging dough underneath to make a nice thick edge.
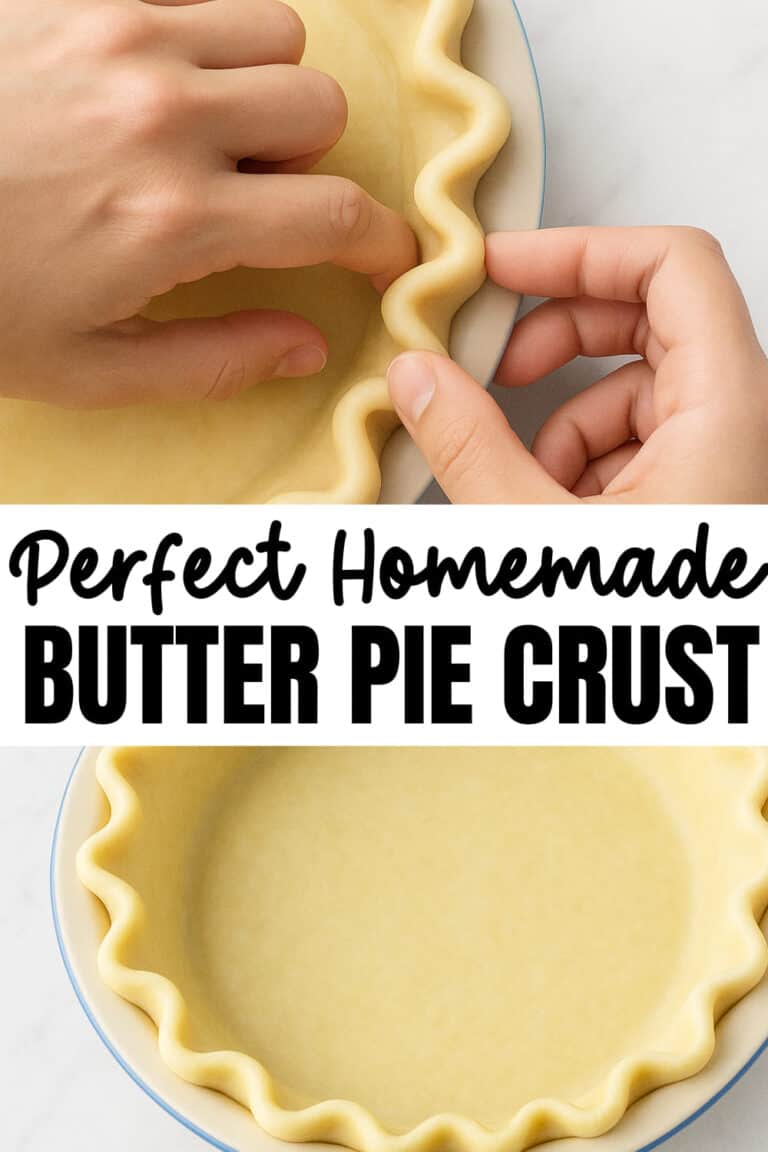
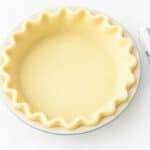
Fluting The Pie Crust Edge for a More Professional Look
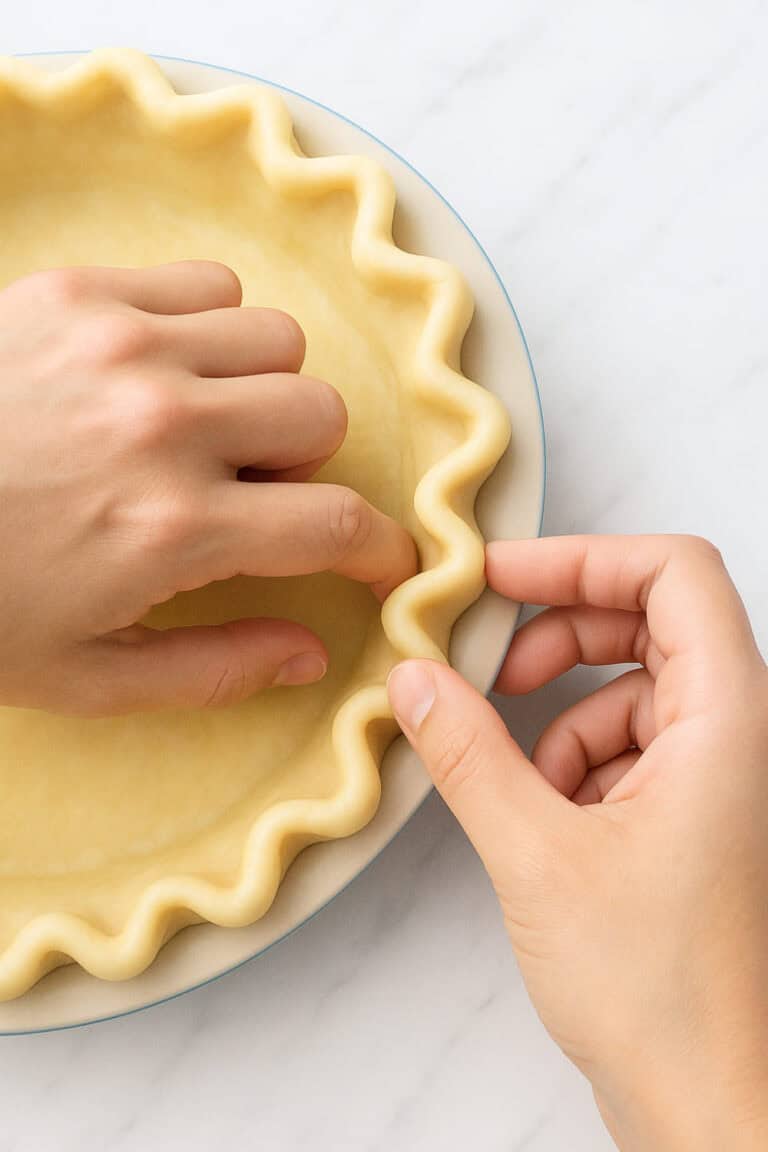
If you want your homemade pie crust to look less RUSTIC and more, look at what a pro chef I am, then try fluting or crimping your pie crust edge.
- Start in the middle of one side of your crust edge
- Take your knuckle (I use my pointer finger) and gently press it into the edge
- While your knuckle is pressing in use your thumb and other pointer finger from your opposite hand to pinch the dough around it
- This creates that pretty wavy pattern everyone thinks is so difficult!
- Move your knuckle over a little bit and repeat
- Keep going all the way around the pie until you meet where you started
If that fancy wave crimping seems too fussy, no worries! You can totally use a fork instead:
- Grab a regular dinner fork (nothing fancy needed)
- Press the fork tines down gently all around the edge of your crust
- Take your time and go slow for a neat pattern
- Don’t push too hard or you’ll poke holes through the crust (learned that one the hard way!)
- Try to keep your fork marks evenly spaced and parallel
This is actually how I taught all three girls to do pie crusts when they were little because its so much easier for small hands.
The Perfect Flakey Butter Pie Crust Recipe
Ever since I started making my own pie curst, the frozen ones from the store just taste like cardboard to me.
The best part is how versatile this one recipe is!
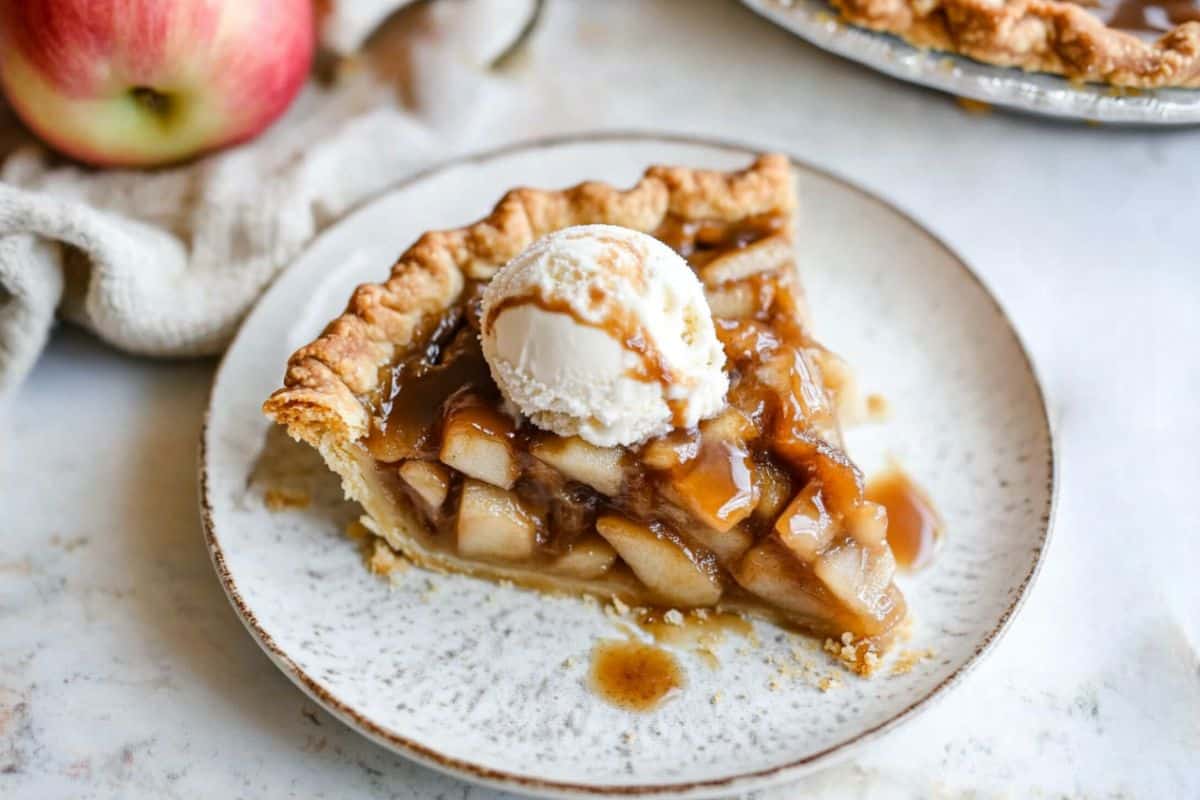
We use it for all our sweet pies obviously (apple, cherry, blueberry, peach, pumpkin at Thanksgiving).
But did you know you can add a tiny bit of sugar to the dough for fruit pies? Makes it just a touch sweeter which the girls love.
This exact same crust works amazing for savory stuff too!
I make chicken pot pie when hubby is home and he literally scrapes the plate clean.
Also quiche for those soccer mornings when we’re running late, hand pies for lunchboxes, and those little appetizer tarts when its my turn to host book club.
Store bought crusts might seem easier but they’re usually filled with weird preservatives and stabilizers.
Plus they cost like 3 times more than making your own!
The taste difference is HUGE.
Homemade has this buttery flakiness that the frozen ones just cant match.
Yes it takes a few extra minutes but most of that time is just waiting while it chills. The actual hands on part is maybe 10 minutes tops.
And seriously nothing feels more satisfying than watching your family devour something you made completely from scratch.
Flaky Pie Crust Recipe
Print RecipeIngredients
- 2 sticks super cold unsalted butter cut into tiny quarter-inch cubes
- 2 and 1/4 cups all-purpose flour
- 1 teaspoon salt I use sea salt but table salt works too
- 8-10 tablespoons ice water literally with ice cubes in it!
Instructions
- Toss your butter, flour and salt into your food processor
- Pulse it about 15-20 quick times until it looks like rough sand with some little butter bits (nothing bigger than peas though!)
- Add the ice water ONE tablespoon at a time through the top tube thingy
- Pulse 4-5 times after each water addition
- Stop adding water when you see the dough starting to clump together and pull away from the sides
- Dump everything onto your counter and quickly push it all together
- Split the dough in half and shape each half into a ball
- Flatten each ball into a 4-inch disc (the girls always argue over who gets to do this part)
- Put each disc in a ziplock bag and chill in the fridge for at least an hour (you can keep it there up to 4 days if you’re planning ahead)
- When ready to roll take the dough out about 3-4 minutes before so it softens just a tiny bit
- Sprinkle some flour on your counter and rolling pin
- Roll from the center outward turning the dough a quarter turn each time
- Keep going until its about 4 inches bigger than your pie plate all around
- If it starts splitting just pinch it back together (happens to me all the time!)
- Let it rest for 5 minutes after rolling (this is when I usually wipe down the counter)
- Transfer to your pie pan crimp the edges and fill with whatever delicious filling you’re making!
- Heat oven to 375 and pierce dough with a fork for air holes bake for 15-20 minutes. Otherwise use this recipe for your pie filling as is.
Quick Tips To Help You
Here are some reminders and tips to help you get the best pie crust for your holiday pies!
Keep EVERYTHING ice cold! This is my number one rule. Have your water with actual ice cubes in it, chill your butter until it’s super firm, and work quickly without interruptions. When the butter stays cold instead of melting, you get those amazing flaky layers that store-bought crusts never have!
- Use real butter and plenty of it! I actually use more butter than most recipes call for (2.5 sticks for a double crust) which sounds crazy but creates this incredibly rich, flavorful crust that puts those weird preservative-filled store versions to shame.
- Avoid overworking the dough at all costs! It’s always better to have a slightly crumbly dough you need to patch together than a tough one.
- Pay attention to your flour choice! I’ve found that different brands make a huge difference. I use Gold Medal which has a medium protein content. The high-protein ones (like King Arthur) can make your crust tough, which nobody wants after all that work!
- Let your dough chill properly before rolling! I know it’s tempting to rush, but that hour in the fridge is non-negotiable unless you want a shrunken sad crust. I usually make my dough while the girls are at soccer practice, then it’s perfectly chilled when I’m ready to make dinner later!
It’s Time To Make that Homemade Pie Crust
I hope you enjoy making this pie crust! Let me know in the comments!
And make sure to follow me on Pinterest for more tasty recipes like this!