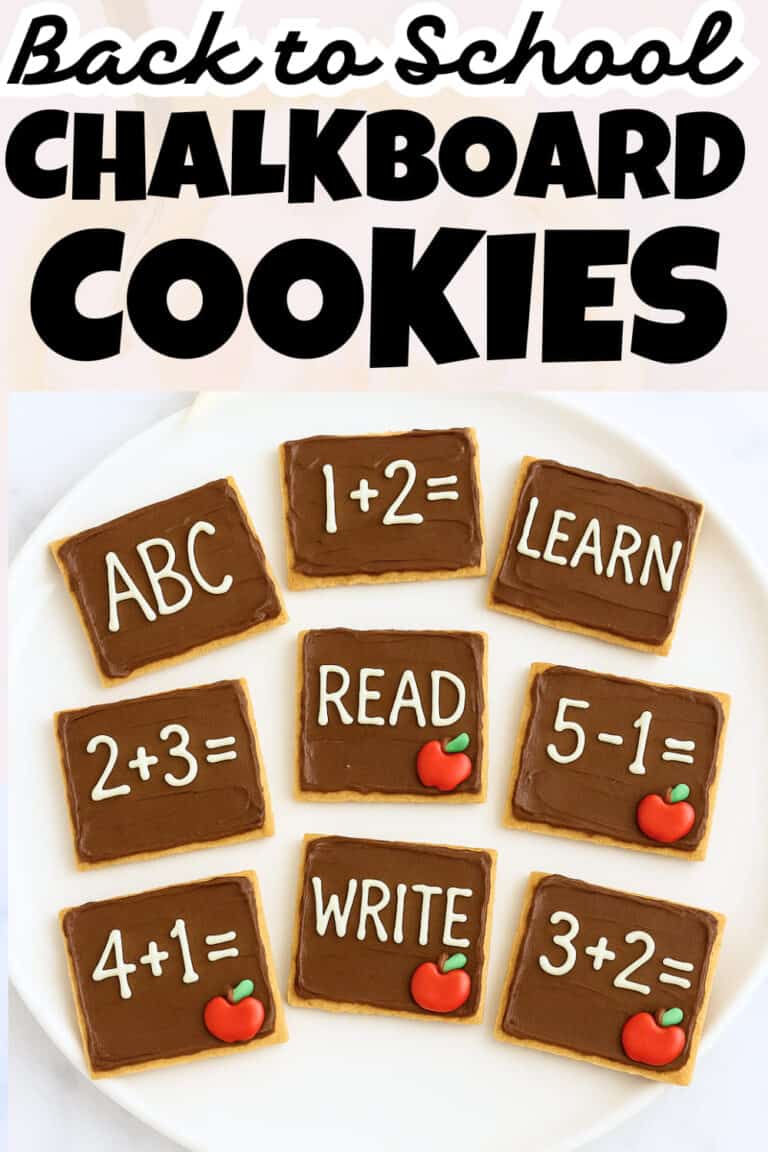
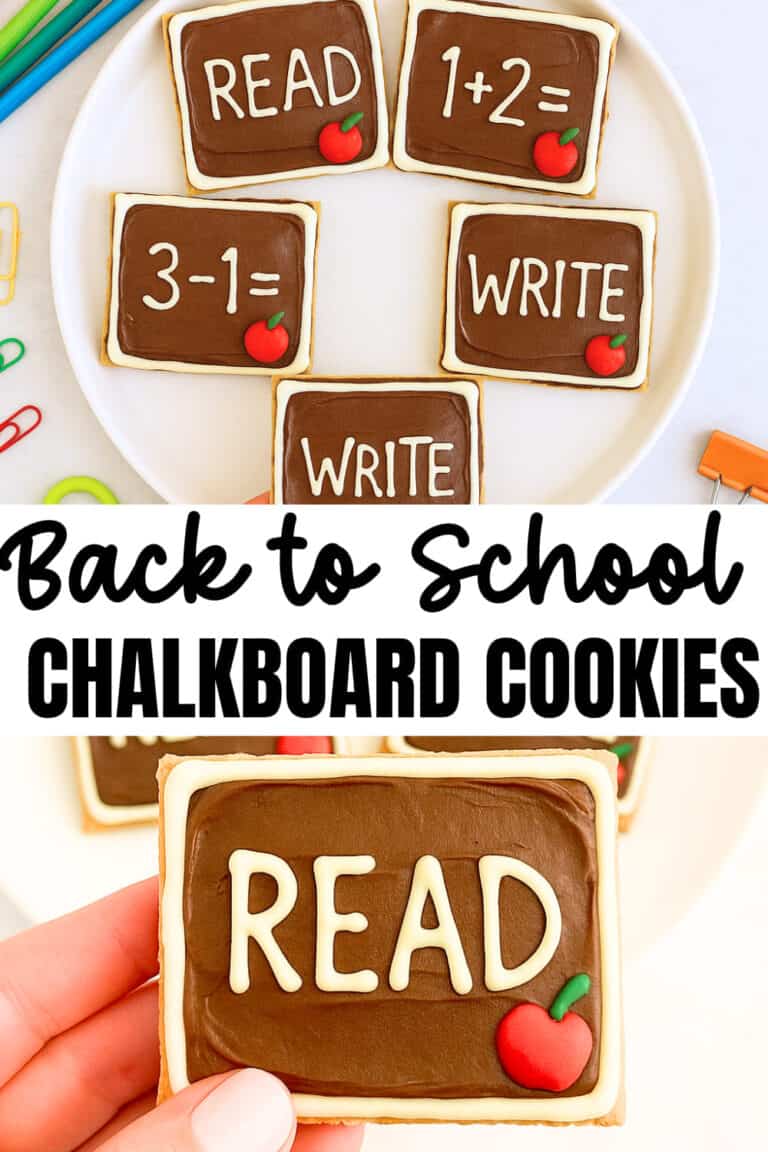
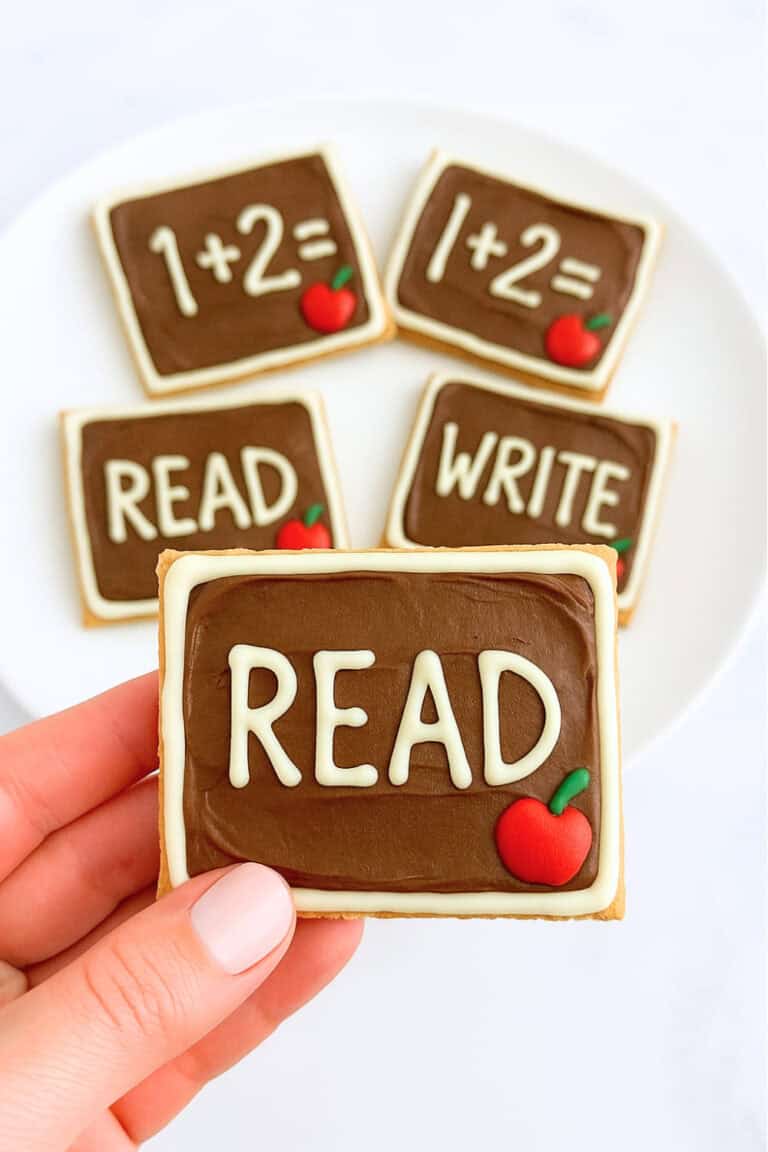
These adorable graham chalkboard treats are perfect for first-day-of-school celebrations or lunchbox surprises!
And, if you don’t already know, this is the latest creation in my daughter’s “Cute Finger Foods Series.”

What makes these back to school treats so special is how simple they are to make, yet they look like you spent hours on them.
My daughter had the best time helping decorate them with ready made frosting and then adding little math equations.
These little graham cracker chalkboard treats are honestly the cutest back-to-school snack my daughter ever made, and they’ve quickly become our traditional first-day treat.
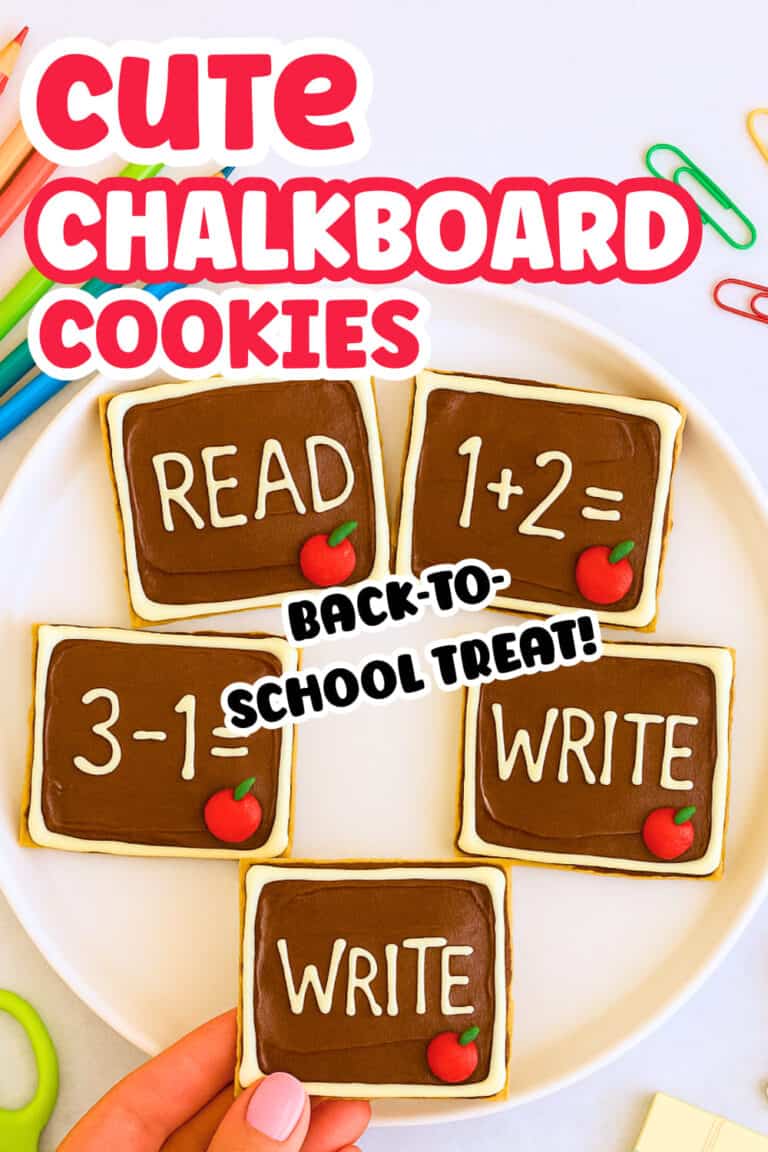
They’re the perfect way to make the transition back to school a little sweeter and more fun!
Here’s how to make these creations.
What You Need to Make Easy Chalkboard Cookies
- Chocolate frosting (the canned kind works great)
- White candy melts (for the “chalk” writing)
- Red heart candies (these become the cute little apples)
- Green sprinkles (for the apple stems)
- Decorating bag (or a ziplock with the corner snipped off)
For best results, use name-brand graham crackers (they break cleaner) and real candy melts instead of white chocolate chips.
The dark chocolate frosting gives the most realistic chalkboard look compared to milk chocolate varieties.
If you can’t find heart candies, red M&Ms work just as well for the little apples!
How to Make These Adorable Chalkboard Cookies
Step 1: Break Up the Crackers
Start by carefully breaking each graham cracker in half width-wise.
We want nice, clean breaks to create perfect little rectangular “chalkboards.”
I’ve found that using a sharp knife to score the cracker first helps get that perfect break.
Step 2: Create Your Chalkboard Base
Spread a nice even layer of chocolate frosting over each graham cracker piece.
This becomes your “chalkboard” surface!
Make sure to get right to the edges for that perfect chalkboard look.
Step 3: Melt Your “Chalk”
Place your white candy melts in a microwave-safe bowl and heat at 50% power, stirring every 30 seconds.
This slow-and-steady approach prevents burning.
You want the melted chocolate to be smooth and flow easily, but not too hot.
Step 4: Prepare Your Piping Tool
Pour that beautiful melted white chocolate into your decorating bag and snip just a tiny bit off the tip. I mean TINY – you can always cut more if needed, but you can’t go back once you’ve cut too much!
Step 5: Time to Decorate
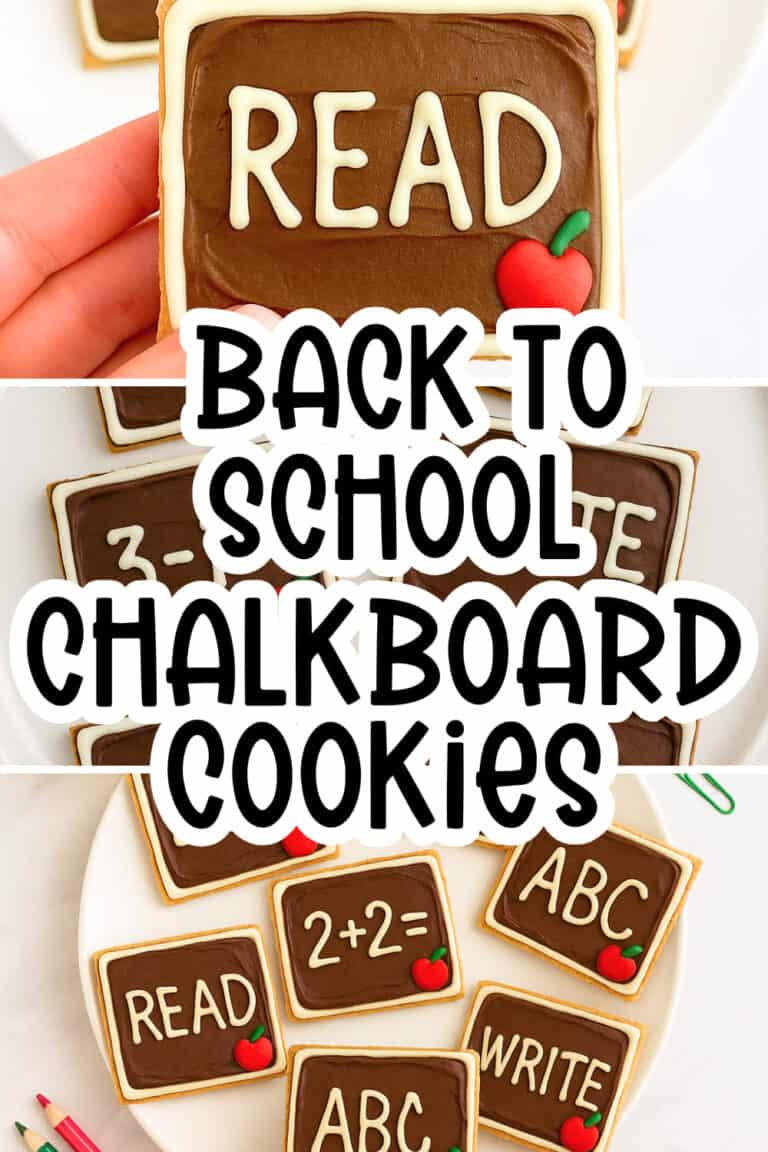
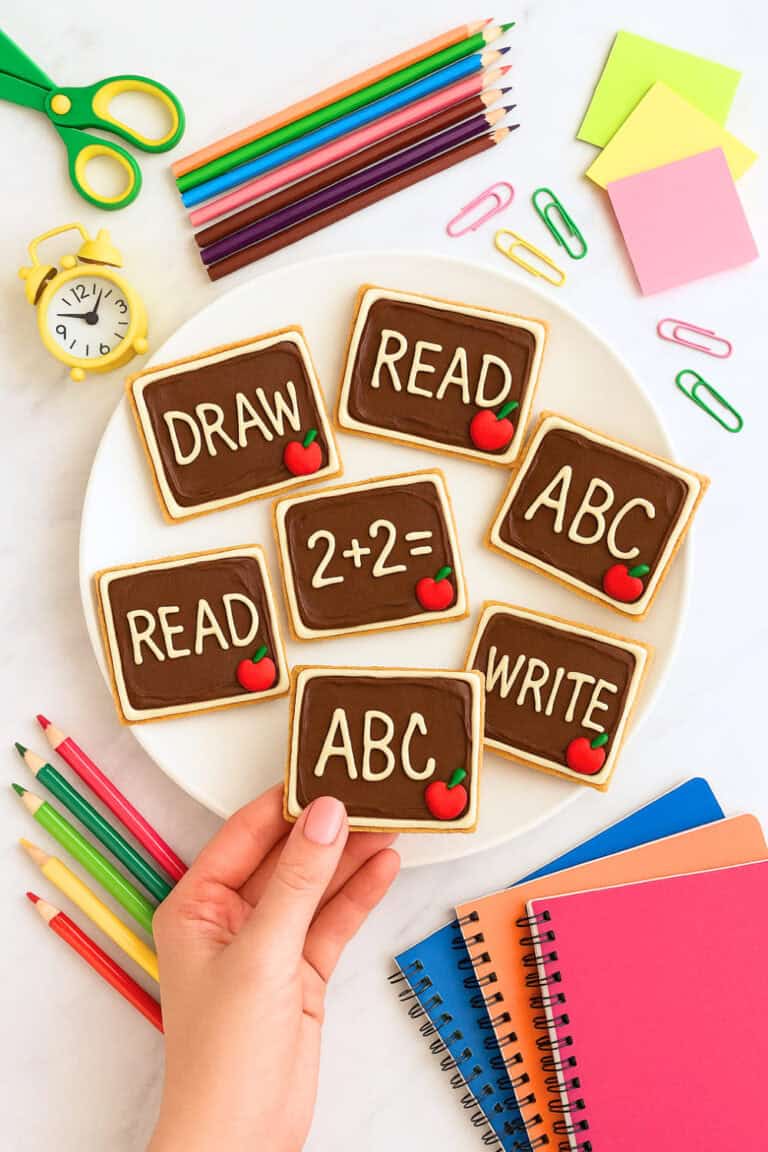
Now for the creative part! Use your melted white “chalk” to write on each chalkboard.
Simple math problems like “1+1=2” are perfect, or you could do ABCs, spelling words, or even “Welcome Back!”
My middle daughter writes each of her siblings’ names on theirs. My youngest just makes squiggles and calls them “cursive” which I think is adorable.
For added effect you can also create a white border around the chalkboard.
Step 6: Add That Classic Teacher’s Apple
Place a red heart candy at the corner of each chalkboard – positioned so the point of the heart faces down, it looks exactly like a little apple!
Step 7: Finish the Apple
Draw a cute border with white icing around the chalkboard and top each heart “apple” with a tiny green sprinkle for the stem. It’s such a small detail but it really makes the whole treat come together!
And there ya go, cute back-to-school chalkboard cookies for your little kiddos!
I hope you and your kid tries to make these for school!

Chalkboard Cookies (with Graham Crackers)
Print RecipeIngredients
- Graham crackers
- Chocolate frosting
- 2 cups white candy melts
- Red heart candies
- Green sprinkles
- Decorating bag or Ziplock bag
Instructions
- Break graham crackers in half width-wise.
- Spread chocolate frosting on each piece.
- Melt white candy melts at 50% power, stirring every 30 seconds.
- Transfer melted chocolate to decorating bag with tiny tip cut off.
- Draw “chalk” writing (math problems, ABCs) on frosted crackers.
- Add red heart candy and green sprinkle for apple decoration.
- With white icing, draw a border around the chalkboard.